

Edit — Working with Images
Sketch to render and AI editing in Fenestra Edit — turn sketches into photorealistic renders, refine details and reimagine architectural and interior scenes.
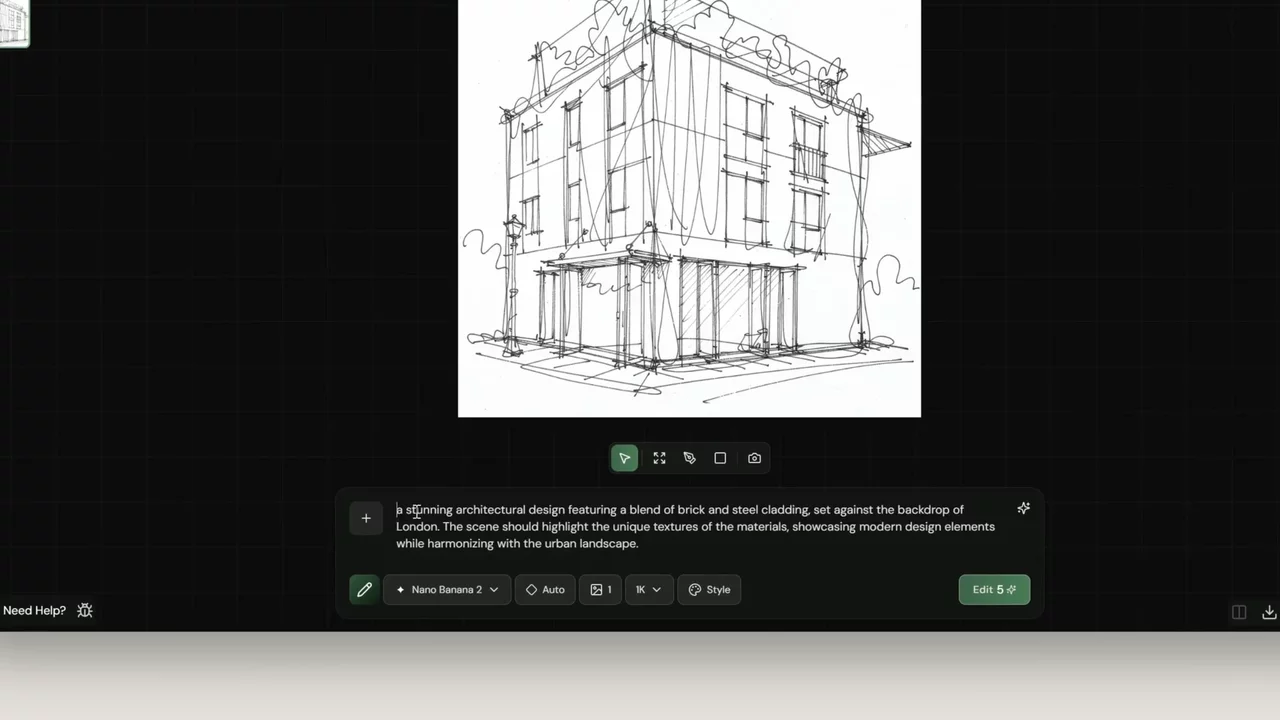
Sketch to render
Start a new session
Click the + button in the left sidebar to create a new session.
Select your image
Click Upload Image / 3D or Browse Assets. For this example we'll browse assets as we already have our input ready. Select your sketch.

Write your prompt
Keep it simple but be specific. Reference the sketch directly and include materiality where relevant. For this example we used:
"Turn this sketch into a photorealistic architectural rendering in London, brick and corten steel."
Using language like "turn this sketch into" tells Fenestra to work from this specific image and nothing else.
After enhancing, the final prompt was:
"Turn this simple sketch into a stunning architectural design featuring a blend of brick and steel cladding, set against the backdrop of London. The scene should highlight the unique textures of the materials, showcasing modern design elements while harmonizing with the urban landscape."

Enhance your prompt
Click the ✦ Enhance prompt button on the right side of the prompt bar to expand your prompt automatically. Inspect the result and make any adjustments before generating.

Set your parameters
- Model → Nano Banana 2
- Aspect ratio → your preference
- Resolution → your preference
- Image count → your preference
Generating more than one image gives you options to choose from.
Generate
Click Edit to generate. Your results will appear in the session sidebar and the main canvas.

Compare
Click Compare in the bottom left to see your input sketch alongside the generated rendering side by side.


Next steps
- Edit — Working with 3D Models — Use the Edit tool to refine and render 3D models.