Edit Area Is Unlimited!?

Shaun McCallum
July 14, 2026Learn how to edit images with AI in Fenestra using prompts, sampled textures and reference images while preserving fine details in 4K and 8K.
Yes, you read that correctly.
Edit Area is unlimited for all Fenestra Pro subscribers and above until August 31, 2026. That means you can edit, experiment and keep refining your images without spending a single credit.
Why are we doing this?
Because we’ve massively upgraded the editing capabilities inside Fenestra—and we want you to properly put them to the test.
You can now use prompts, sampled textures and reference images together to control exactly how different areas of your architectural images are changed. Replace materials, test new finishes, fix those tiny details that have been bothering you and create completely new design variations without having to regenerate the entire image.
You can even edit images in 4K or 8K while preserving the fine details of the original.
Yeah… seriously!

What Is Edit Area?
Edit Area lets you select one part of an image and transform it without changing everything else.
Maybe you love the lighting, composition and furniture in your render, but the wall material just isn’t working. Normally, you might have to go back into your 3D software, update the material, rerender everything and hope it still looks the same.
Or you regenerate the entire image with AI - and suddenly the room, lighting and half the furniture are different.
Not ideal.
With Edit Area, you can select the wall, provide the material you want and update that part of the image while keeping the rest of your scene intact.
Use it to:
- Replace walls, floors and façade materials
- Test new furniture and finishes
- Change landscaping or exterior details
- Fix small rendering mistakes
- Create multiple options for a client
- Update an image without re-rendering your whole image
Basically, if there’s one part of an image you want to change, you shouldn’t have to start again.
Prompts, Textures and Reference Images - All Together
This is where the update gets interesting.
You can now combine three different types of input inside your editing workflow:
- A prompt describing what you want
- A sampled texture showing the exact material
- A reference image showing the look or design direction
Why does that matter?
Because describing a specific architectural material with words isn’t always easy. “Light stone” could mean limestone, travertine, sandstone or about a hundred other things.
Now, you can show Fenestra the actual texture and use your prompt to explain how it should be applied. Make sure you're always giving the ai model an action, Make this, Replace this, Update this, Edit This, Add This and so on.
For example:
Apply this limestone texture to the selected wall as large-format panels with subtle joints and a soft matte finish.
The texture controls the material. The prompt explains how it should behave. Use Reference images to add specific furniture as well!
Combine all three and you get much more control over the final result.
Edit the Details Without Losing the Details
Architectural images depend on small details.
Material grain, clean edges, lighting, reflections, furniture, joints and surface imperfections all help make a render feel believable. The problem with editing or regenerating an entire image is that you can easily lose the details that were already working.
Edit Area focuses the generation on the part of the image you select. This lets you refine a material or design element while preserving much more of the original composition and detail.
And it works on high-resolution images too.
You can edit 4K and even 8K images, making the workflow suitable for presentation boards, client pitches, marketing visuals and large-format images.
No shrinking the image down, editing it and trying to upscale it again afterwards.
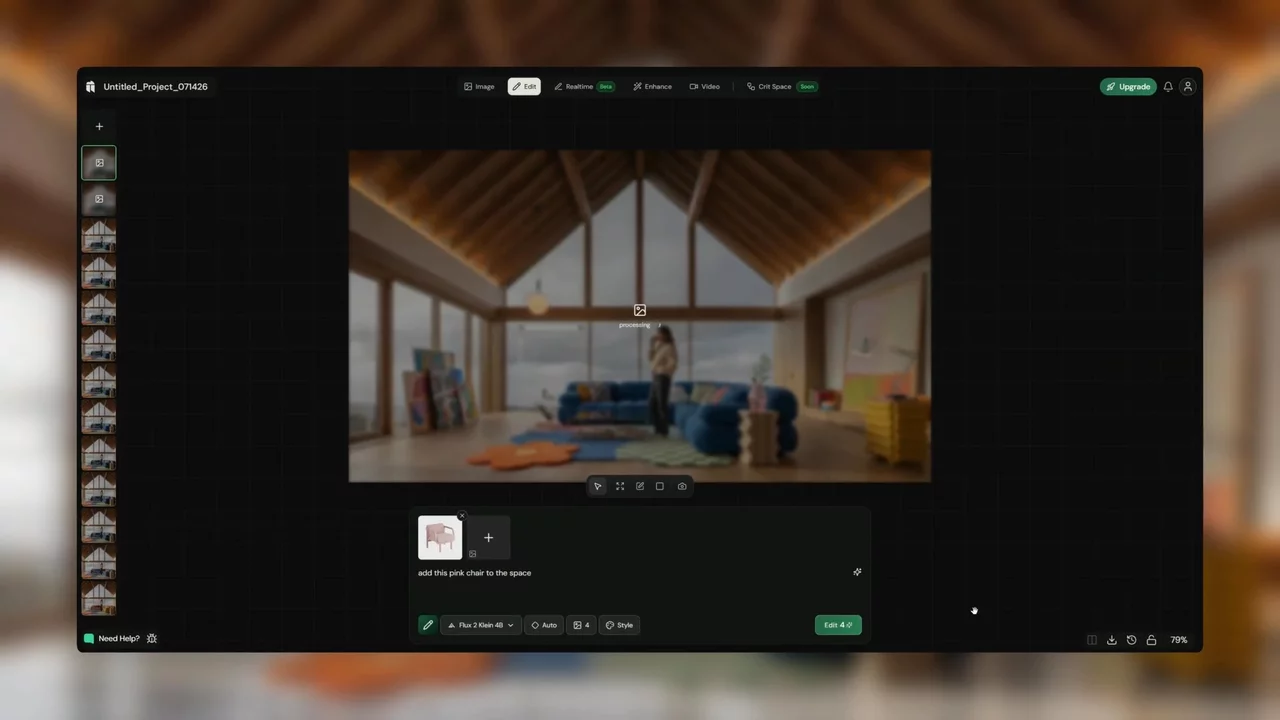
How Does It Work?
Here’s the full workflow.
1. Upload your image
Start with your existing architectural render, AI-generated image, photograph, sketch or other visual.
2. Select what you want to change
Mark the exact part of the image you want Fenestra to edit.
3. Write your prompt
Describe the new material, object or result. Try to include the colour, finish, scale and lighting you want.
4. Add a texture or reference
Add a 2D texture or add a reference image to give Fenestra more visual information.
5. Generate your edit
Fenestra updates the selected area while preserving the rest of the image.
6. Keep refining
Change your prompt, adjust the selection or try another texture until it looks right.
And because Edit Area is unlimited for Pro subscribers until the end of July 2026, none of these edits should you a single credit.
What Can You Use It For?
There are loads of ways to use Edit Area in an architectural workflow. You could take one interior render and test five different floor materials before presenting it to a client. Replace a generic AI-generated wall texture with the exact material from your specification. Update furniture without changing the rest of the room. Fix a façade detail without sending the entire scene back through another render.
You can also use it earlier in the design process.
Rather than treating the image as something you produce at the end, you can use Fenestra to explore different ideas while the project is still developing. Make a version, compare it, change it and keep moving.

Unlimited Until August 31
For a limited time, Edit Area is completely unlimited for all Pro subscribers and above.
From now until August 31, 2026, eligible Edit Area generations won’t use any credits.
So yes, this is your chance to properly experiment with it. Try different textures. Break things. Fix them. Make ten versions of the same wall because the first nine shades of beige weren’t quite right!
Edit Until You're happy
Get Unlimited Editing NowRelated Articles

Flux 3 for Architecture and Interior Design
Flux 3 Image is live in Fenestra. Local edits that leave the rest of your render untouched, ten references in one frame, and native 4K for presentation boards.

Crit Space early access: join the waitlist
Crit Space puts a whole project on one board: renders, variations, video and sketches side by side, with the people you work with. Join the early access waitlist.

Illustrate from 3D. Present with intent.
Turn 3D models or architectural renderings into stylised illustrations with Fenestra, no redrawing required. Reference images, style settings and tips.
 AI rendering software for architects. Turn sketches, CAD drawings and 3D models into photorealistic renders and animations, in your browser.